.
.
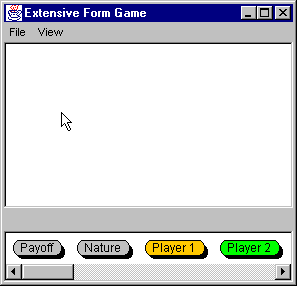
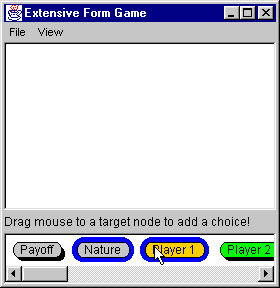
The editor for designing games in extensive form games
appears on the screen. The  ,
,  and
and  icons
are the main building blocks:
icons
are the main building blocks:
| You can set up the
experiment by clicking on .
The editor for designing games in extensive form games
appears on the screen. The |
|
 |
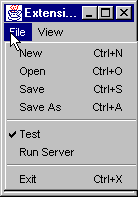
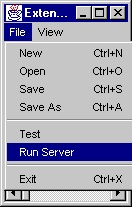
The File menu allows the instructor to create new files, open existing files, save files, test games, run games, and to exit from the tree editor. |
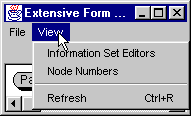 |
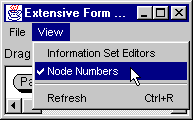
The View menu allows the instructor to determine the information set for each player, to view node numbers, and to refresh the screen. |
|
|
The Payoff icon represents a terminal node and allows the instructor to determine the players' payoffs for each possible outcome. |
|
|
The Nature icon allows the instructor to determine probability distributions over exogenous events. |
 |
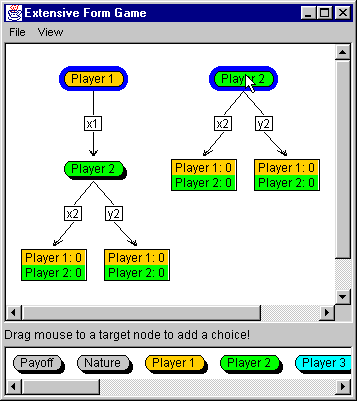
The Player icon allows the instructor to determine who is involved (i.e. the set of players). |
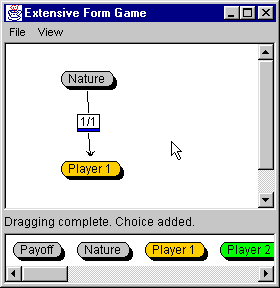
From the File menu, choose New
To start editing the tree:
|
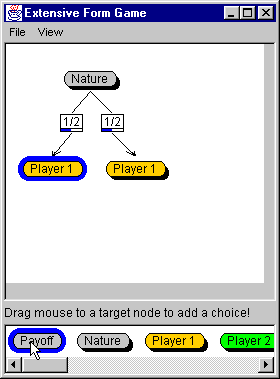
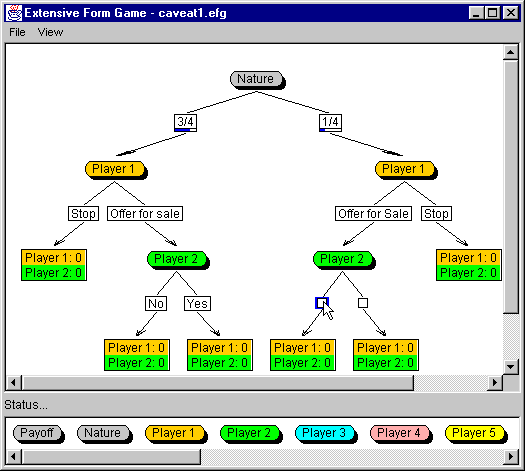
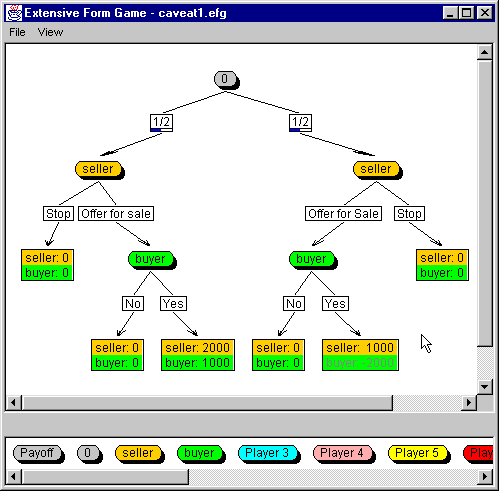
The branch was created that connects two points, a chance node (i.e. Nature) and a decision node (i.e. Player 1). | ||
 |
 |
||
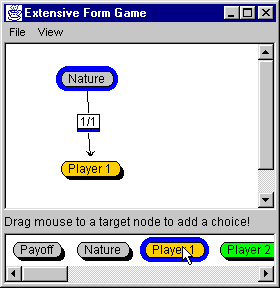
To add another branch following
the root:
|
|||
 |
 |
||
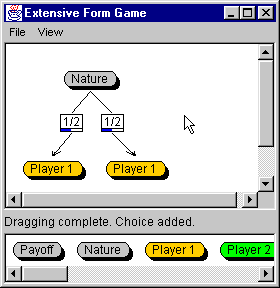
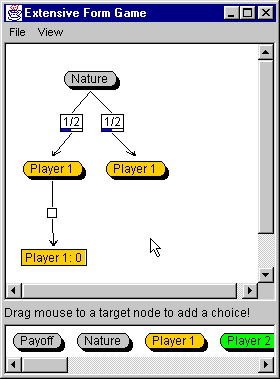
To add any branch:
|
|||
 |
 |
||
To continue adding branches:
|
|||
|
|
|||
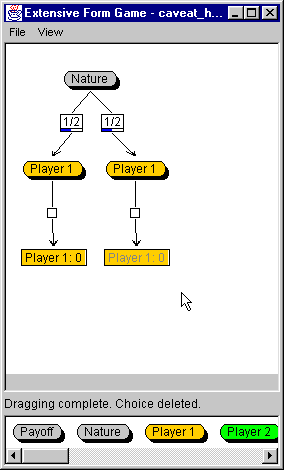
To delete a branch:
|
A branch that connects
the predecessor and the successor decision node is erased as well as the
successor decision node (in our example Player 2 decision node).
Note that the payoffs are updated simultaneously on all the terminal nodes when a player is deleted from the tree diagram. |
|
 |
 |
|
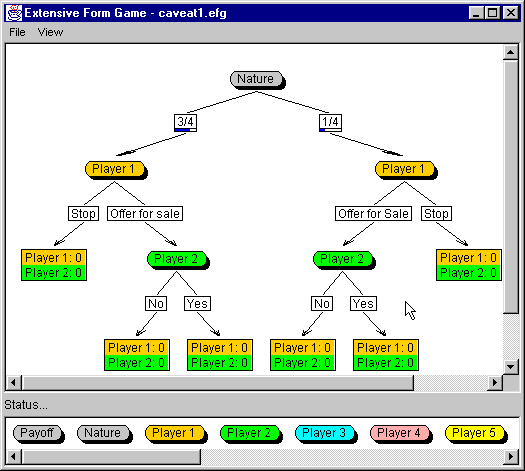
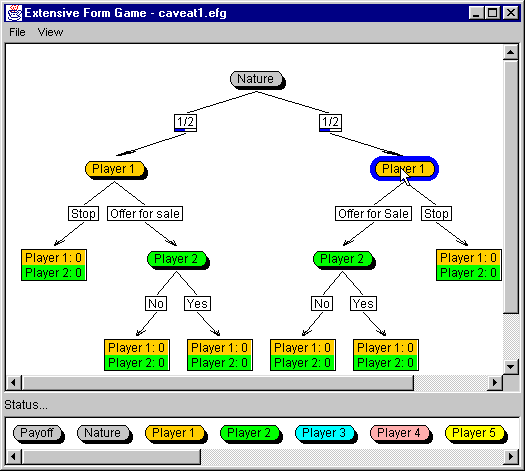
| A chance node has a default label "Nature"
(the name can be changed by the instructor), and the branches that follow
the chance node would be determined by some random mechanism, according
to the probabilities that are shown on the branches (by default each branch
has an equal weight).
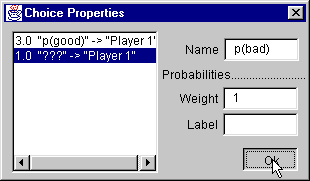
To edit chance probabilities on branches:
|
 |
A window with Choice Properties
appears.
|
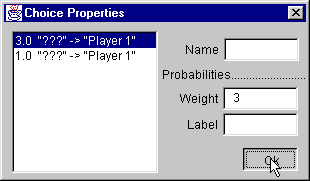 |
Every alternative at a chance
node can also have a name.
|
 |
 |
|
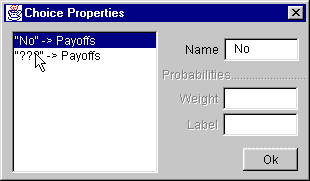
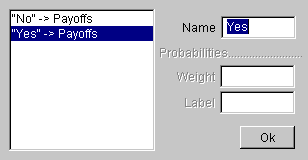
Each alternative at a node that is controlled
by a player should have a move label. To edit move labels on branches:
|
 |
A window with Choice Properties
appears.
|
 |
|
 |
 |
|
Each non terminal node has by default a player
label that is in the set {Nature, Player 1, Player 2,
, Player 16}. To
edit a Player label, or a Nature label:
|
 |
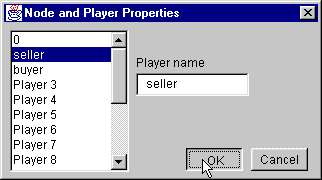
A window with Node and
Player Properties appears:
|
|
| Note that the labels are also automatically updated at the bottom of the editor, and in all the terminal nodes (i.e. payoffs). | |
 |
|
To edit information sets:
|
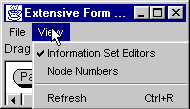 |
| When Information Set Editors
is selected, every node controlled by a player receives a second label
(i.e. a plus sign above the node) that allows the instructor to specify
the information state. (Note, that Nature and a player that appears only
once in the tree diagram do not receive plus signs.)
To represent the set of nodes that cannot be distinguished by a player
|
|
 |
|
| By connecting the nodes in this set, the information set of player i (i.e. the buyer) is depicted by a dotted line in the same color as player i (i.e. the buyer). |
 |
| The set of move labels following the two nodes must be the same if the two nodes are controlled by the same player in the same information state. If move labels do not match, they are highlighted red to warn the instructor that the game is not meaningful, and the program will not allow the instructor to play the game. |
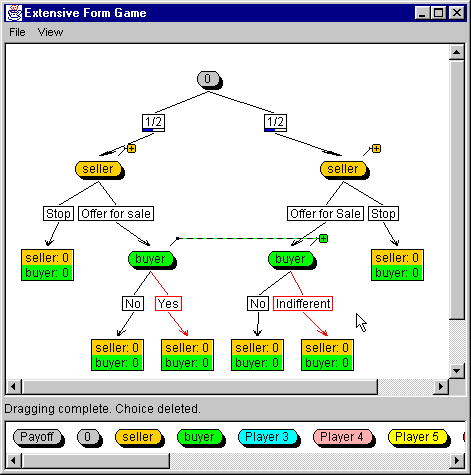 |
To delete the set of nodes that
cannot be distinguished by a player
|
 |
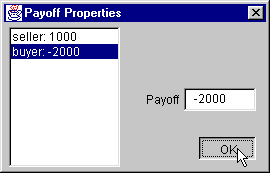
| Each terminal node has a label that specifies
for each player i , a number that is interpreted as a payoff for
player i , when this node is the outcome of the game. By default
all the payoffs are set to zero.
To change the payoffs
|
 |
A window with Payoff
Properties appears.
|
 |
 |
|
To reposition a node
|
 |
| Each node is given a number, which
allows the instructor to distinguish between nodes when the experiment
is conducted, and the data analyzed.
To view Node numbers
|
 |
 |
|
| The test option under File
menu allows the instructor to conduct the game before releasing it .
The instructor will be able to observe:
|
 |
|
|
 |
|
|
|
 |
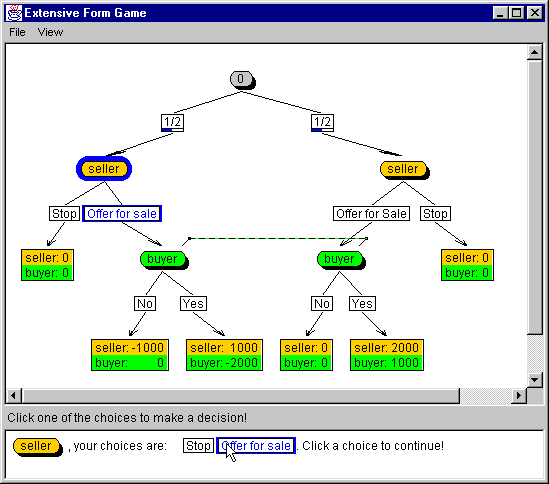
| The buyer selected "Yes" in the example below and the results of the game show that the seller earned 1000 in this game, and the buyer ended with 2000. |
 |
| The program permits creating disconnected
trees as an intermediate step in representing a game in an extensive form.
To connect the tree:
|
 |
| However the program does not permit disconnected tree, and displays the message: " More than one root nodes have been found" after the test has been performed. | 
|
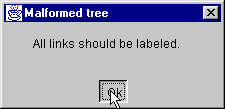
| If the instructor runs the test on the game in which at least one alternative at a node that is controlled by a player does not have a move label, the game cannot be conducted. |
 |
 |
|
|
 |
|
To run the experiment follow the procedure decribed below:
|
 |
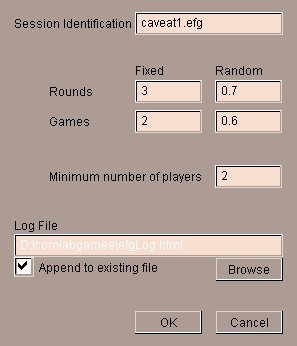
| Session Identification:
Provides a box for typing a name for a game. By default the file name of the game in the extensive form (i.e. the tree) will appear. Rounds:
Type total number of players participating in the experiment. By default the number needed to start a single game appears in the box (i.e. the number of players defined in the tree) Log File: By default efgLog.html file appears in the box with the option to append it to the existing file. To change the default name click on Browse.The output file can be read by standard spreadsheet programs (i.e.Excel)
|
|
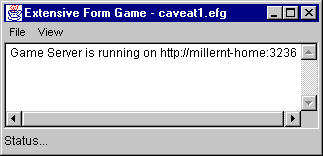
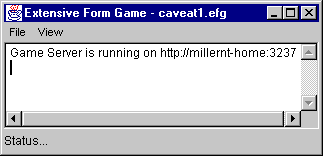
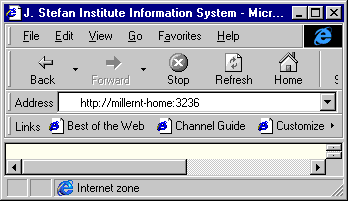
The window with the instructors computer
address appears on the screen like the one below.
|
 |
 |
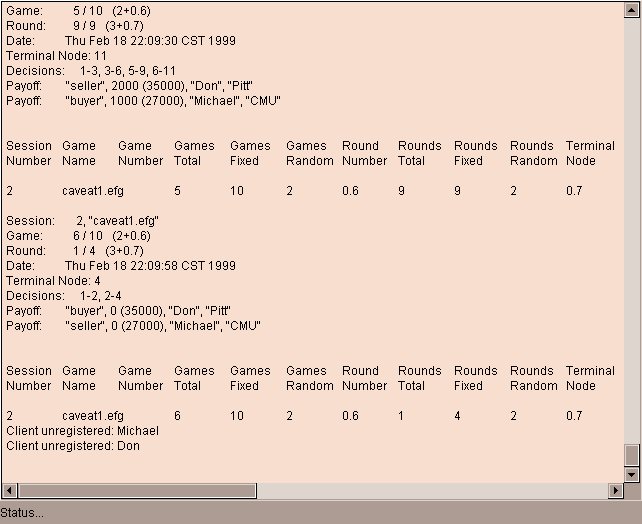
| The instructor can follow the game on the window that opens at the time he starts the game. |
 |
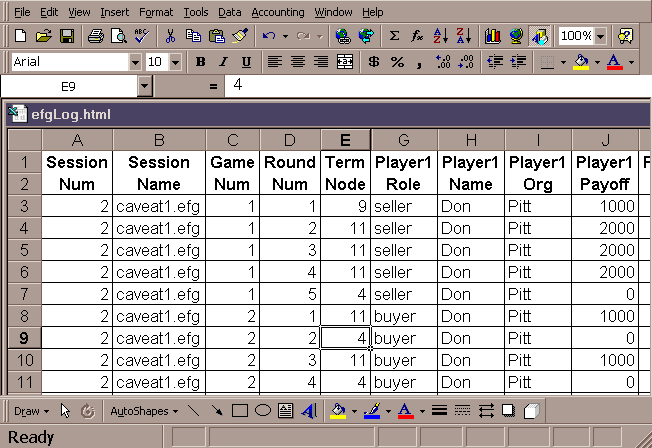
| The output file "EfgLog.html" can be imported into standard spreadsheet program (Excel) and looks like the example below: |
 |
The following instructions should be given
to players:
|
 |
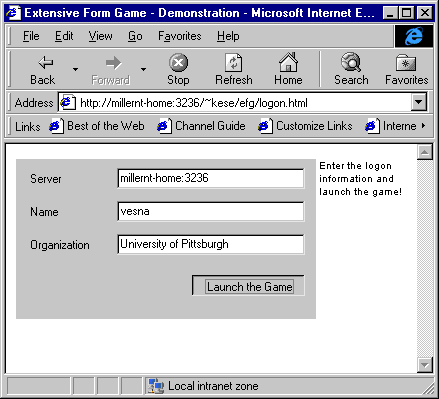
| After connecting to the address given by the instructor, a player login information appears on the screen: |
 |
|
| After a player launches the game, the game in the extensive form (i.e. a tree) appears on a players screen with the message: "Wait for more players to join the game". When a minimum number of players required by the game structure connects to the game (in our example the minimum number of players are two, a seller and a buyer), the players matched for that session can start selecting the moves. |
 |
| When the minimum number of players has been
connected to the game, a randomly assigned players name or number appears
at the bottom (i.e. in our example "seller"), so that a participant
knows the role he was assigned to.
The choices appear next to the assigned players name or number at the bottom of the window when the player has to make the next move. Players make their choices by
|
 |
| "Buyer" makes the next move and the message
appears next to the assigned role (i.e. the choices in our example are
"No" and "Yes"). A player selects a choice by
|
 |
| When the game ends, the terminal node that is reached is highlighted in blue and the outcome corresponding to that terminal node is shown at the bottom of the window for the players paired for that game. |
 |
| When the game is over, players will be informed with the message presented in the Figure. | 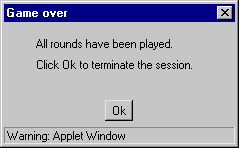 |